1 概述
vue,前端界面框架
2 基础
npm install vue
npm install vue-loader --save
先安装好sublime text3的vue syntax 插件和npm关于vue的包
var webpack = require('webpack');

module.exports = {
  entry: './index.js',
  output: {
    path:'dist',
    filename: 'bundle.js'
  },
  module:{
    loaders: [
      { test: /\.vue$/, loader: 'vue'},
      { test: /\.js$/, exclude: /node_modules/, loader: "babel-loader"},
      {test: /\.css?$/,loaders: ["style-loader","css-loader"],include: __dirname}
    ]
  },
  vue: {
   loaders: {
      js: 'babel'
    }
  },
  resolve: {
    alias: {
      'vue$': 'vue/dist/vue.common.js'
    },
    extensions: ['', '.js', '.css', '.scss','.vue'],
  },
  plugins:[
  ]
}
配置webpack关于vue文件的处理,以及vue中关于template的处理
<!doctype html>
<html>
    <head>
        <meta charset="utf-8">
        <title>Vue For Learn</title>
    </head>
    <body>
        <div id="app"><app></app></div>
        <script src="dist/bundle.js"></script>
    </body>
</html>
网页文件,注意有一个app的div标签,里面还有一个app的自定义标签
import Vue from 'vue'
import App from './src/app.vue'

new Vue({
 el: '#app',
 components: { App }
})
入口的index.js文件,就是引入app.vue组件,并挂载到#app位置上即可
<template>
<div class="message">{{ msg }}</div>
</template>

<script>
export default {
    data () {
        return {
            msg: 'Hello from vue-loader!'
        }
    }
}
</script>

<style>
.message {
 color: blue;
}
</style>
这是app.vue文件,很明显,这个组件式的写法,直接包含了html,style和script,非常的直接
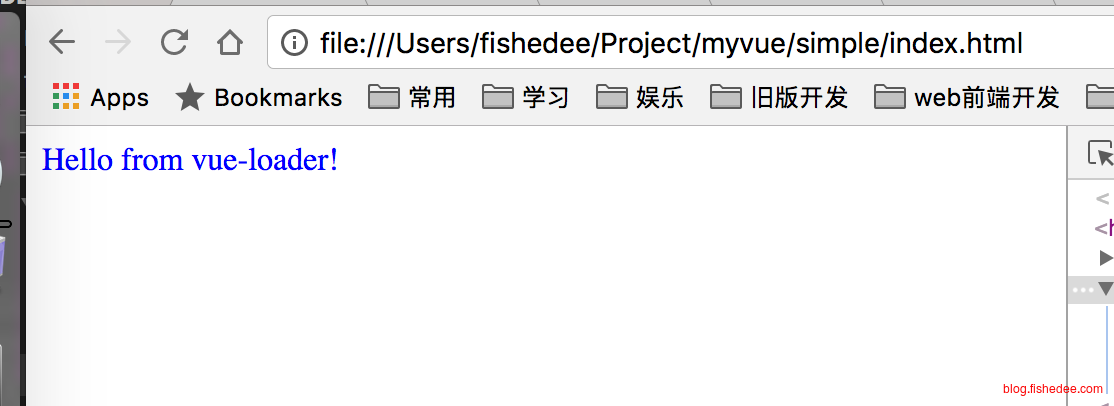
启动后就能看到这个页面了,很明显,vue中的组件很好地解决了react中的style与html怎么独立引入组件的问题
3 生命周期
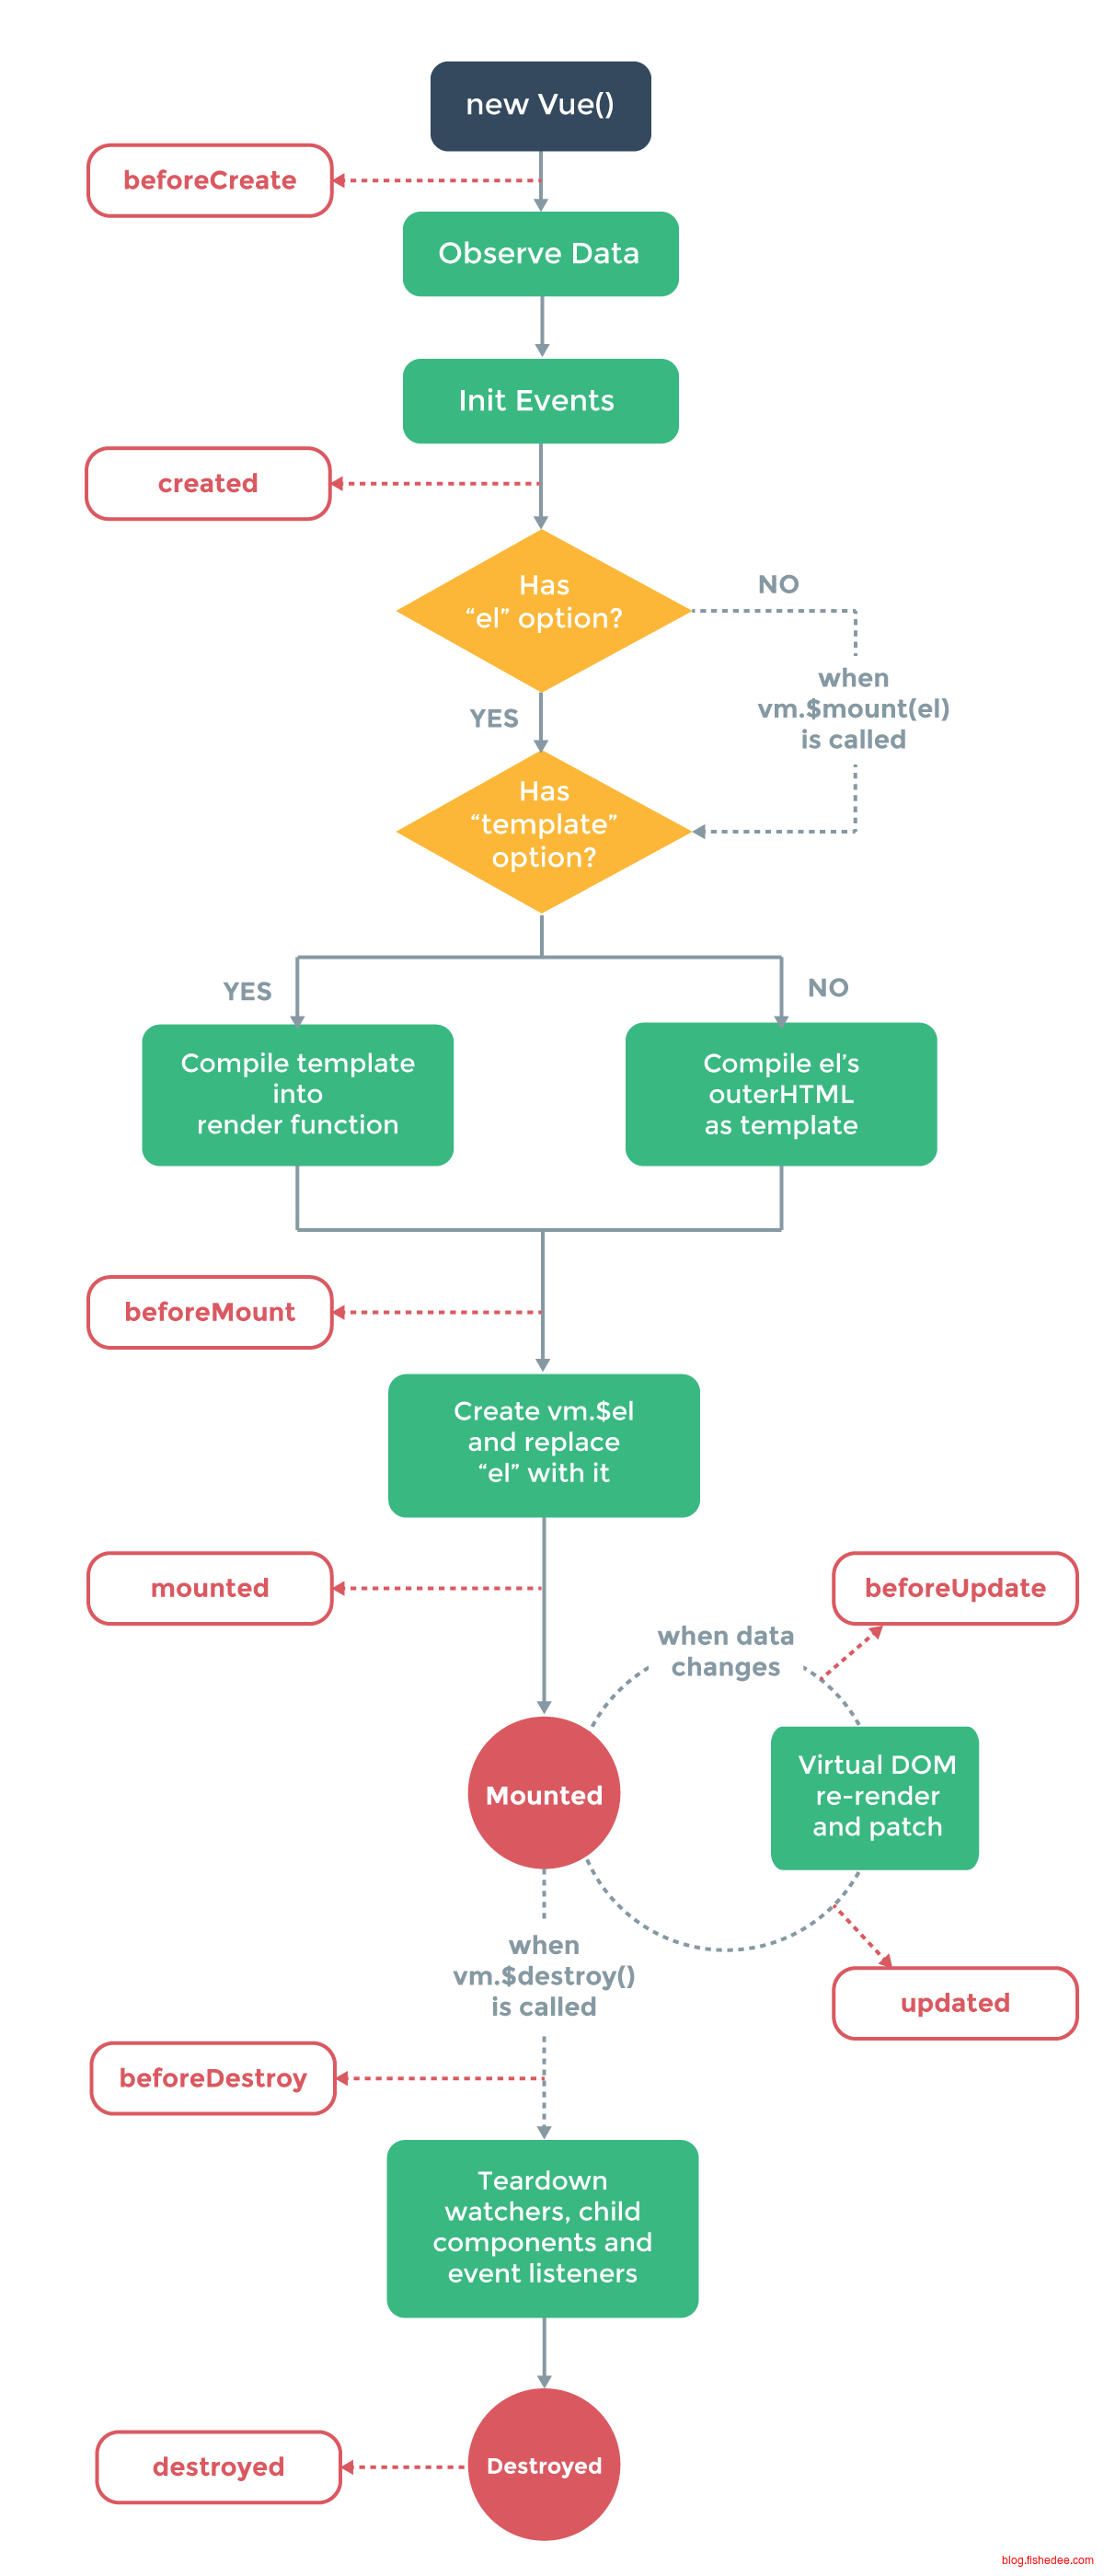
生命周期都挺直接简单的
4 模板语法
4.1 基础指令
<template>
<div>
    <!--(v-text)-->
    <div class="message">{{ msg }}</div>
    <!--(v-html)-->
    <div v-html="rawHtml"></div>
    <!--(v-bind)-->
    <div v-bind:id="dynamicId">动态属性</div>
    <!--(v-if)-->
    <p v-if="seen">Now you see me</p>
    <!--(v-on)-->
    <a v-on:click="doSomething">点我</a>
</div>
</template>

<script>
export default {
    data () {
        return {
            msg: 'Hello from vue-loader!',
            rawHtml:'<h1>I am html</h1>',
            dynamicId:'fishId10001',
            seen:(Math.random() > 0.5),

        }
    },
    methods:{
        doSomething(event){
            alert(event);
        }
    }
}
</script>

<style>
.message {
 color: blue;
}
</style>
绑定text,html,事件等等,一目了然
4.2 表达式
<template>
<div>
    <div>{{ number + 1 }}</div>
    <div>{{ ok ? 'YES' : 'NO' }}</div>
    <div>{{ message.split('').reverse().join('') }}</div>
</div>
</template>

<script>
export default {
    data () {
        return {
            number:1000,
            ok:(Math.random()>0.5),
            message:'fish',
        }
    }
}
</script>

<style>
.message {
 color: blue;
}
</style>
绑定的数据可以变为表达式,注意,每个绑定都只能包含单个表达式。不能做太复杂的逻辑,这个设计非常好
4.3 过滤器
<template>
<div>
    <div>{{ message | capitalize }}</div>
</div>
</template>

<script>
export default {
    data () {
        return {
            message:'fish',
        }
    },
    filters: {
        capitalize: function (value) {
          if (!value) return ''
          value = value.toString()
          return value.charAt(0).toUpperCase() + value.slice(1)
        }
    }
}
</script>

<style>
.message {
 color: blue;
}
</style>
使用bash中的管道语法,将message传入filter函数后输出,显然,管道是可以串联的
5 属性
5.1 普通属性
<template>
<div>
    <div>{{ number }}</div>
    <button v-on:click="add">增加</button>
</div>
</template>

<script>
export default {
    data () {
        return {
            number:1,
        }
    },
    methods: {
        add: function () {
          this.number ++;
        }
    }
}
</script>

<style>
.message {
 color: blue;
}
</style>
普通属性就是那些定义在data的属性,注意,这些属性在变更时,ui会自动刷新
<template>
<div>
    <div>{{ firstName }}</div>
    <div>{{ lastName }}</div>
    <div>{{ fullName }}</div>
    <button v-on:click="mod1">更改firstName</button>
    <button v-on:click="mod2">更改lastName</button>
</div>
</template>

<script>
export default {
    data () {
        return {
            firstName: 'Foo',
            lastName: 'Bar',
            fullName: 'Foo Bar'
        }
    },
    watch: {
        firstName: function (val) {
          this.fullName = val + ' ' + this.lastName
        },
        lastName: function (val) {
          this.fullName = this.firstName + ' ' + val
        }
    },
    methods:{
        mod1:function(){
            this.firstName += 'm';
        },
        mod2:function(){
            this.lastName += 'c';
        }
    }
}
</script>

<style>
.message {
 color: blue;
}
</style>
你可以watch这些属性的变化,当它们变化时,触发回调
5.2 计算属性
<template>
<div>
    <div>{{ firstName }}</div>
    <div>{{ lastName }}</div>
    <div>{{ fullName }}</div>
    <button v-on:click="mod1">更改firstName</button>
    <button v-on:click="mod2">更改lastName</button>
</div>
</template>

<script>
export default {
    data () {
        return {
            firstName: 'Foo',
            lastName: 'Bar',
        }
    },
    computed: {
        fullName: function () {
            return this.firstName + ' ' + this.lastName;
        }
    },
    methods:{
        mod1:function(){
            this.firstName += 'm';
        },
        mod2:function(){
            this.lastName += 'c';
        }
    }
}
</script>

<style>
.message {
 color: blue;
}
</style>使用computed属性,当firstName或lastName发生变化时,computed属性也会改变。但是,要注意的是,computed依赖哪些属性是通过第一次时调用时确定的,这样的设计使得computed属性有缓存的能力,同时也埋下了坑
<template>
<div>
    <div>{{ firstName }}</div>
    <div>{{ lastName }}</div>
    <div>{{ fullName }}</div>
    <button v-on:click="mod1">更改firstName</button>
    <button v-on:click="mod2">更改lastName</button>
</div>
</template>

<script>
export default {
    data () {
        return {
            firstName: 'Foo',
            lastName: 'Bar',
            isFirst:true,
        }
    },
    computed: {
        fullName: function () {
            if( this.isFirst ){
                this.isFirst = false;
                return this.firstName;
            }else{
                return this.firstName + ' ' + this.lastName;
            }
        }
    },
    methods:{
        mod1:function(){
            this.firstName += 'm';
        },
        mod2:function(){
            this.lastName += 'c';
        }
    }
}
</script>

<style>
.message {
 color: blue;
}
</style>
第一次computed时只有firstName与isFirst参与,所以,后续修改lastName都不会触发computed属性的变更。
<template>
<div>
    <div>{{ firstName }}</div>
    <div>{{ lastName }}</div>
    <div>{{ fullName }}</div>
    <div>{{ fullNameLength }}</div>
    <button v-on:click="mod1">更改firstName</button>
    <button v-on:click="mod2">更改lastName</button>
</div>
</template>

<script>
export default {
    data () {
        return {
            firstName: 'Foo',
            lastName: 'Bar',
            isFirst:true,
        }
    },
    computed: {
        fullName: function () {
            return this.firstName + ' ' + this.lastName;
        },
        fullNameLength:function(){
            return this.fullName.length;
        }
    },
    methods:{
        mod1:function(){
            this.firstName += 'm';
        },
        mod2:function(){
            this.lastName += 'c';
        }
    }
}
</script>

<style>
.message {
 color: blue;
}
</style>同时,计算属性支持依赖其他计算属性,这个非常棒,而且计算属性的依赖前后可以颠倒,只要这些computed之间不是形成环形依赖就可以了
6 样式
6.1 类
<template>
<div>
    <div v-bind:class="class1"></div>
    <div v-bind:class="[class2,class3]"></div>
    <div v-bind:class="{class4:isClass4Active,class5:isClass5Active}"></div>
    <div v-bind:class="class6"></div>
</div>
</template>

<script>
export default {
    data () {
        return {
            class1: 'class1Name',
            class2: 'class2Name',
            class3: 'class3Name',
            isClass4Active:true,
            isClass5Active:false,
        }
    },
    computed: {
        class6:function(){
            return {
                active: false,
                'text-danger': true
            };
        }
    }
}
</script>

<style>
.message {
 color: blue;
}
</style>
v-bind:class做了特定的语法糖,支持单class,多class(数组),多控制class(object)
6.2 样式
<template>
<div>
    <div v-bind:style="style1">Hello Fish1</div>
    <div v-bind:style="[style2,style3]">Hello Fish1</div>
    <div v-bind:style="{ color: activeColor, fontSize: fontSize + 'px' }">Hello Fish2</div>
</div>
</template>

<script>
export default {
    data () {
        return {
            style1:{
                color:'red',
                fontSize:'10px',
            },
            style2:{
                color:'blue',
            },
            style3:{
                fontSize:'30px',
            },
            activeColor: 'yellow',
            fontSize: '20',
        }
    }
}
</script>

<style>
.message {
 color: blue;
}
</style>
跟class一样,支持单style,多style,以及映射style。而且,vue的style依然是驼峰写法,并且加入了自动的浏览器前缀,这个跟React.createStyle实在太像了。
7 条件渲染
7.1 多条件
<template>
<div>
    <div v-if="type === 'A'">
      A
    </div>
    <div v-else-if="type === 'B'">
      B
    </div>
    <div v-else-if="type === 'C'">
      C
    </div>
    <div v-else>
      Not A/B/C
    </div>
    <input v-model="type"/>
</div>
</template>

<script>
export default {
    data () {
        return {
            type:'A',
        }
    }
}
</script>

<style>
.message {
 color: blue;
}
</style>
简单的v-if,v-else-if与v-else的用法
7.2 key重用
<template>
<div>
    <template v-if="loginType === 'username'">
      <label>Username</label>
      <input placeholder="Enter your username">
    </template>
    <template v-else>
      <label>Email</label>
      <input placeholder="Enter your email address">
    </template>
    <button v-on:click="toggle">toggle</button>
</div>
</template>

<script>
export default {
    data () {
        return {
            loginType:'username',
        }
    },
    methods:{
        toggle:function(){
            this.loginType = (this.loginType=='username'?'mail':'username');
        }
    }
}
</script>

<style>
.message {
 color: blue;
}
</style>
在输入时会发现切换后vue依然沿用了原来的input控件,导致input控件重用
<template>
<div>
    <template v-if="loginType === 'username'">
      <label>Username</label>
      <input placeholder="Enter your username" key="1">
    </template>
    <template v-else>
      <label>Email</label>
      <input placeholder="Enter your email address" key="2">
    </template>
    <button v-on:click="toggle">toggle</button>
</div>
</template>

<script>
export default {
    data () {
        return {
            loginType:'username',
        }
    },
    methods:{
        toggle:function(){
            this.loginType = (this.loginType=='username'?'mail':'username');
        }
    }
}
</script>

<style>
.message {
 color: blue;
}
</style>
解决办法就是加入key,区别不同的input,很明显,vue采用的virutal dom比较算法跟react是一样的,抄袭得有点明显呀
7.3 show
<template>
<h1 v-show="ok">Hello!</h1>
</template>

<script>
export default {
    data () {
        return {
            ok:true,
        }
    }
}
</script>

<style>
.message {
 color: blue;
}
</style>
使用show控制是否显示,这里是通过display来实现的,而不是if的dom插入删除来实现。
8 列表渲染
8.1 基础循环
<template>
    <ul id="example-2">
      <li v-for="(item, index) in items">
        {{ parentMessage }} - {{ index }} - {{ item.message }}
      </li>
    </ul>
</template>

<script>
export default {
    data () {
        return {
            parentMessage: 'Parent',
            items: [
              { message: 'Foo' },
              { message: 'Bar' }
            ]
        }
    }
}
</script>

<style>
.message {
 color: blue;
}
</style>
使用v-for的循环,简单,暴力
8.2 key
<template>
    <ul id="example-2">
      <li v-for="(item, index) in items" key="item.id">
        {{ parentMessage }} - {{ index }} - {{ item.message }}
      </li>
    </ul>
</template>

<script>
export default {
    data () {
        return {
            parentMessage: 'Parent',
            items: [
              { message: 'Foo' ,id:'10001'},
              { message: 'Bar' ,id:'10002'}
            ]
        }
    }
}
</script>

<style>
.message {
 color: blue;
}
</style>
使用key来加快列表的重新渲染,这里也是同样和react一样
8.3 数组更新检测
push()
pop()
shift()
unshift()
splice()
sort()
reverse()
数组的以上方法触发后,会触发重新渲染
vm.items[indexOfItem] = newValue
vm.items.length = newLength
但是这样并不能触发数组的变化,所以,数组的元素不能为基本元素,只能为Object
9 事件绑定
9.1 基本事件
<template>
    <div id="example-1">
      <button v-on:click="counter += 1">增加 1</button>
      <p>这个按钮被点击了 {{ counter }} 次。</p>
    </div>
</template>

<script>
export default {
    data () {
        return {
            counter:1
        }
    }
}
</script>

<style>
.message {
 color: blue;
}
</style>
把事件直接写到v-on上,内联事件绑定
<template>
    <div id="example-1">
      <button v-on:click="onclick">增加 2</button>
      <p>这个按钮被点击了 {{ counter }} 次。</p>
    </div>
</template>

<script>
export default {
    data () {
        return {
            counter:1
        }
    },
    methods:{
        onclick:function(event){
            this.counter += 2;
            console.log(event);
        }
    }
}
</script>

<style>
.message {
 color: blue;
}
</style>
将事件写入到methods上,方法事件绑定,注意方法的第一个参数可以获取到事件信息
9.2 捆绑事件
<template>
    <div id="example-3">
      <button v-on:click="say('hi',$event)">Say hi</button>
      <button v-on:click="say('what',$event)">Say what</button>
    </div>
</template>

<script>
export default {
    data () {
        return {
            counter:1
        }
    },
    methods:{
        say:function(mm,event){
            console.log(mm);
            console.log(event);
        }
    }
}
</script>

<style>
.message {
 color: blue;
}
</style>
调用时加入特定的参数,注意可以用$event来获取事件信息
9.3 事件修饰符
.stop
.prevent
.capture
.self
.once
可以在事件后加上这些修饰符
<template>
    <div id="example-3" v-on:click="doAll">
      <button v-on:click.stop="doThis">click me</button>
    </div>
</template>

<script>
export default {
    data () {
        return {
            counter:1
        }
    },
    methods:{
        doAll:function(){
            console.log("doAll");
        },
        doThis:function(){
            console.log("doThis");
        }
    }
}
</script>

<style>
.message {
 color: blue;
}
</style>
stop阻止了事件冒泡
10 控件绑定
10.1 基本绑定
<template>
    <div>
        <input v-model="message" placeholder="edit me">
        <p>Message is: {{ message }}</p>
    </div>
</template>

<script>
export default {
    data () {
        return {
            message:'mm'
        }
    }
}
</script>

<style>
.message {
 color: blue;
}
</style>
略显神奇的v-model,当input输入时,会直接修改this.message,而进一步造成控件渲染,实现了MVVM的杀手功能双向绑定。其实实现原理很简单,平时的v-bind只是data->view的映射,v-model只是加上了view->data的映射而已
10.2 绑定修饰
<template>
    <div>
        <input v-model.lazy="message" placeholder="edit me">
        <p>Message is: {{ message }}</p>
    </div>
</template>

<script>
export default {
    data () {
        return {
            message:'mm'
        }
    }
}
</script>

<style>
.message {
 color: blue;
}
</style>
加入lazy修饰符,当控件丢失焦点时才会触发修改data
11 组件化
11.1 属性与事件
<template>
    <div>
        <h1>{{title}}</h1>
        <button v-on:click="add">You clicked me {{ count }} times.</button>
    </div>
</template>

<script>
export default {
    props: ['title'],
    data () {
        return {
            count:0,
        }
    },
    methods: {
        add: function () {
          this.count++
          this.$emit('click')
          this.$emit('change',this.count)
        }
    }
}
</script>

<style>
</style>
这是counter组件的代码,跟普通的vue一样,不同的地方有两个,组件提供属性和事件的控制,属性需要增加props,事件在触发时使用this.$emit就可以了。
<div v-for="counter,index in counters" v-bind:key="counter.id">
    <counter v-bind:title="counter.title" v-on:click="addAllClick" v-on:change="change(index,$event)"/>
</div>
使用组件时就和使用普通的组件一样,属性用v-bind传递,事件用v-on传递。
<template>
    <div class="alert-box">
        <strong>Error!</strong><slot/>
    </div>
</template>

<script>
export default {}
</script>

<style>
.alert-box{
    padding: 10px 20px;
    background: #f3beb8;
    border: 1px solid #f09898;
}
.alert-box strong{
    font-weight:600;
}
</style>
这是alert组件,slot的用法就像react中的this.props.children。
<alert>Something bad is happend</alert>使用时将文本或其他组件扔进去就可以了。
11.2 注册
import counter from './counter.vue'
vue.component('counter', counter)
组件有两种注册方式,全局注册和局部注册,全局注册就是上面这一种,一旦全局注册后,任意地方的template都可以用名字来直接引用这个组件。
import alert from './alert.vue'
export default {
    data(){return xxx}
    ....
    components:{
        alert
    }
}
局部注册就是在使用这个组件时,将组件放入到components中,注册的名字就是components中key的名字。
11.3 动态组件
<component v-bind:is="currentTabComponent"/>vue中提供了动态组件的方法,就是通过组件名字来生成这个组件,用v-bind:is就可以了。
12 总结
vue的优点:
- html,css与js比react更优雅地结合在一个文件上。react的代替品是jsx,createStyleSheet和js,明显更直观简单。
- 不需要setState,直接修改数据就能刷新页面,而且不需要react的shouldComponentUpdate就能实现最高效的渲染路径。
- 渐进式的开发模式,模版方式->组件方式->路由整合->数据流整合->服务器渲染。上手的曲线更加平滑简单,而且不像react一上来就是组件全家桶
- v-model给开发后台管理系统带来极大的便利,反观用react开发后台就是个杯具
- 自带keep-alive优化,解决react中切换页面后状态丢失的问题,这个实在是漂亮。
缺点:
- vue 2.0后渲染方式明显与react的virtual dom一个算法,抄袭有点明显
- data的观察渲染模式虽然高效,但很多坑,数组不能为基础类型,必须为复合类型,对象增减属性也不会触发渲染
- 组件的属性传递没有react的直观和明显
- script与template是分离的,而react的script与template是一体的,这增加了太多的概念。同样的道理,vue中事件与属性是分离的,而react中属性是函数时,就当事件来用就好了,就这么简单。
所以,如果你想开发后台系统或小页面时,vue是个很好的选择。但是想开发庞大的单页面时,react在可靠性与直观度上其实更优。
参考资料
- 本文作者: fishedee
- 版权声明: 本博客所有文章均采用 CC BY-NC-SA 3.0 CN 许可协议,转载必须注明出处!