0 概述
javascript开发工具汇总
1 tsc
代码在这里
1.1 安装依赖
npm install --save-dev @types/node
npm install --save-dev typescript使用安装依赖,@types/node是node的类型声明,客户端开发的可以不装
{
    //typescript的选项
    "compilerOptions": {
        "lib": ["es2015", "dom"], //表示在有es2015和dom的环境下开发,这会影响在ts环境中可以使用的API
        "module": "commonjs", //使用commonjs的模块导入方式
        "outDir": "lib", //输出的目录
        "declaration": true, //输出带有.d.ts的声明文件
        "sourceMap": true, //输出带
        "strict": true, //语法的严格检查
        "jsx": "react", //react语法转换
        "esModuleInterop": true, //esModule的模块转换
        "moduleResolution": "node", //模块分析
        "target": "es2015" //输出js文件的目标环境
    },
    "inclue": [
        "src" //输入的文件夹
    ]
}
写入以上的tsconfig.json文件
console.log("Hello World");
function a(go:string){
    console.log(go+"xg");
}
a("mm")
在src/index.ts写入以上的代码
1.2 命令
1.2.1 普通编译
npx tsc执行编译,生成代码在dist文件夹中
tsc --project tsconfig.json执行编译,一般在tsconfig.json中指定为es5的target
tsc --project tsconfig.json --module es2015 --outDir esm执行编译,指定为es2015的module
1.2.3 watch编译
npx tsc --watchwatch的编译方式
1.3 配置
1.3.1 paths
代码在这里
{
    //typescript的选项
    "compilerOptions": {
        "lib": ["es2015", "dom"], //表示在有es2015和dom的环境下开发,这会影响在ts环境中可以使用的API
        "module": "commonjs", //使用commonjs的模块导入方式
        "outDir": "dist", //输出的目录
        "declaration": true, //输出带有.d.ts的声明文件
        "sourceMap": true, //输出带
        "strict": true, //语法的严格检查
        "baseUrl": ".",
        "target": "es2020" ,//输出js文件的目标环境
        "paths":{
            "@/*":["src/*"],
        }
    },
    "inclue": [
        "src/**/*" //输入的文件夹
    ],
}
在compilerOptions中配置paths的选项,我们就能简化在引入模块时的指定
import A from '@/gg/a';
export default ()=>{
    return "B"+A();
}
写代码的时候轻松使用@符号来引用src下的模块,避免每次都是../../的引用方式。
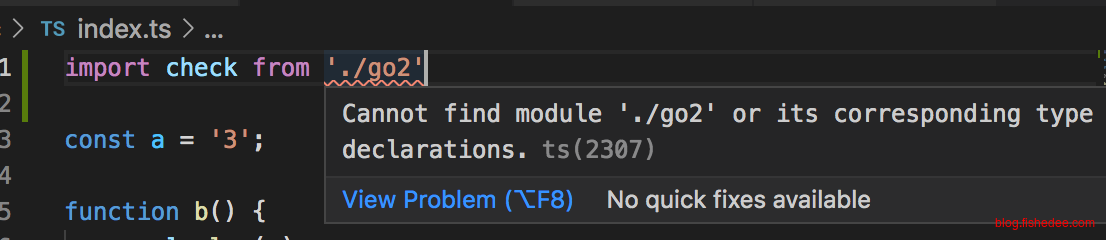
注意,这种方式引用改变的仅仅是编译时的模块路径查找,当代码编译成为js文件以后,依然不能正常运行。因为node环境并不支持@符号的模块路径查找。
2 ESLint
代码在这里
ESLint是代码严格检查的辅助工具,TSLint已经废弃了,要用这个工具
2.1 安装依赖
npm install --save-dev eslint安装依赖
npx eslint --init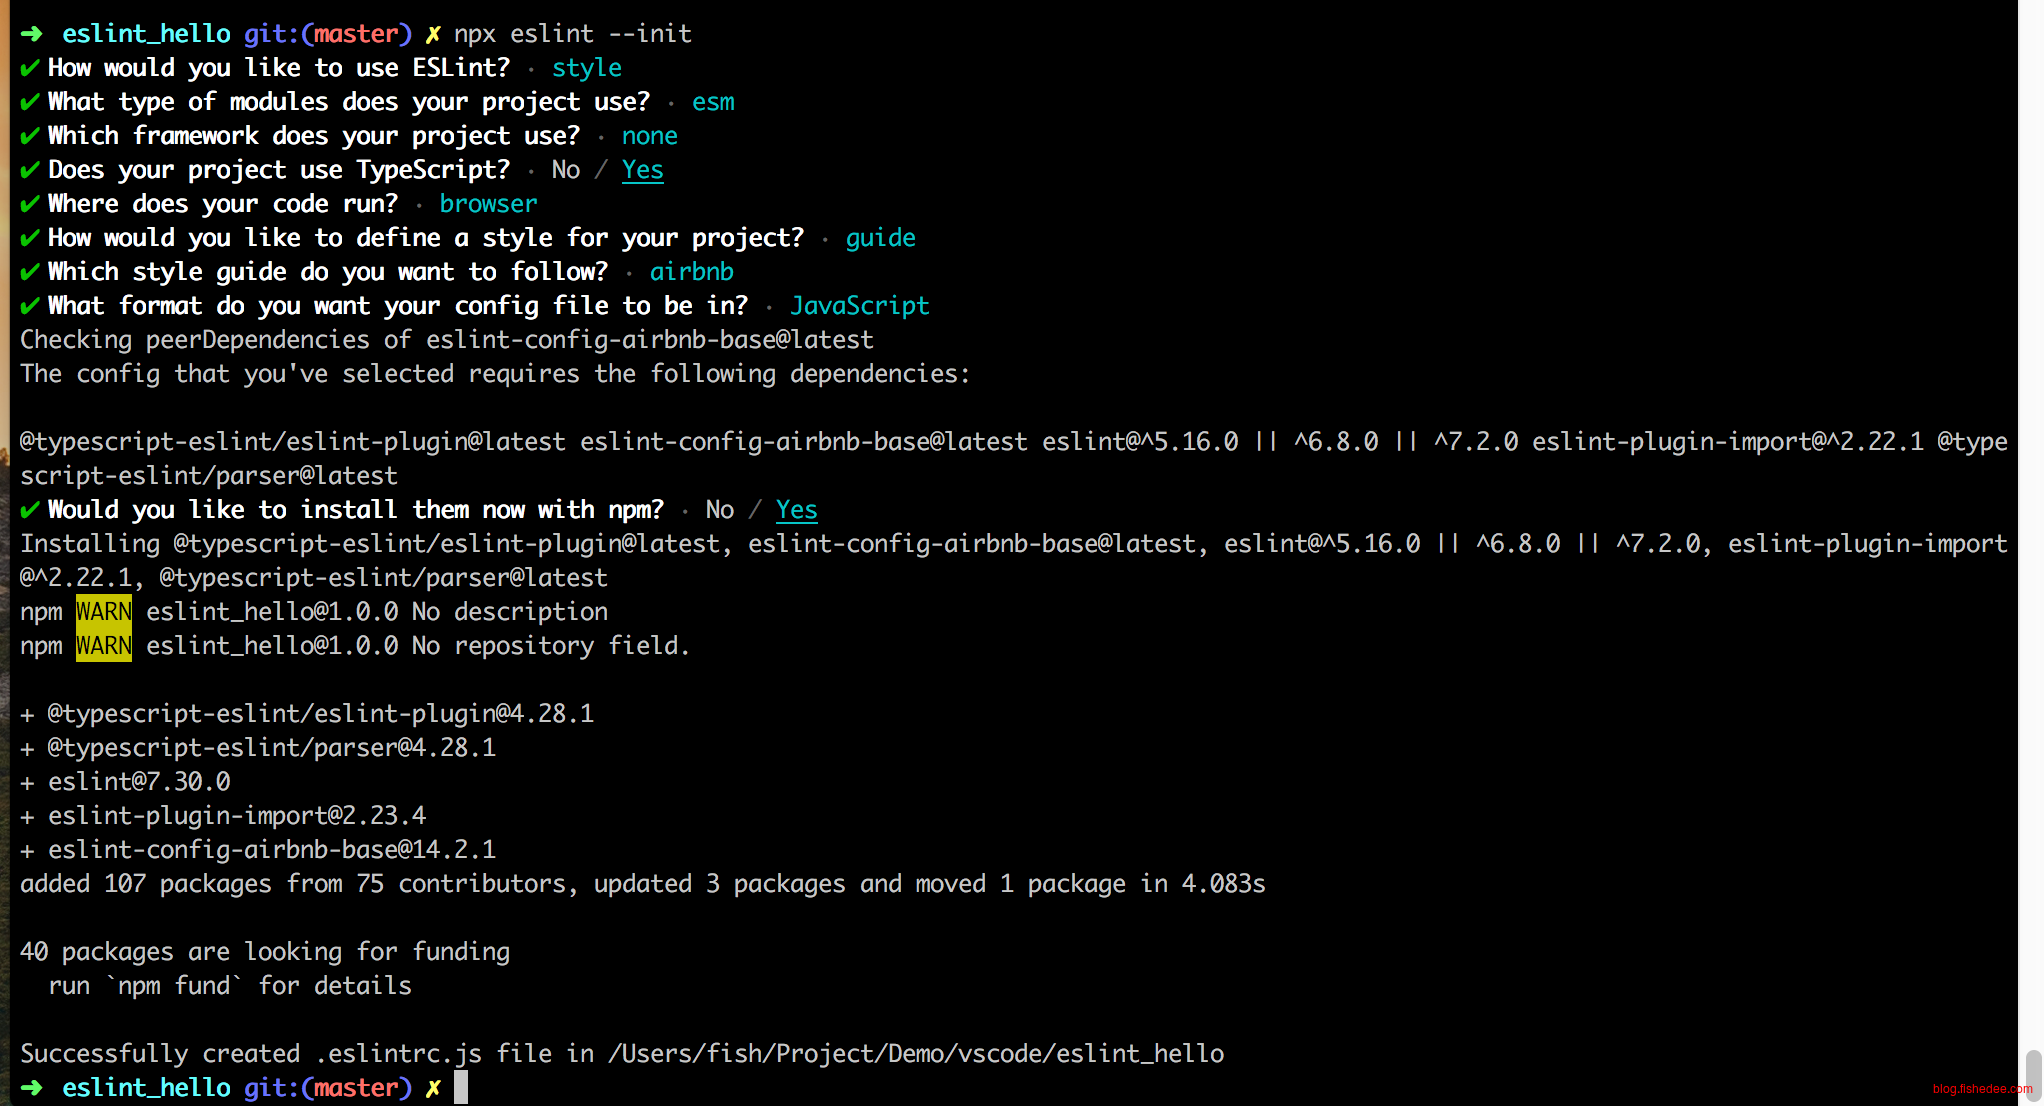
交互式写入默认的eslint配置文件
module.exports = {
  env: {
    browser: true,
    es2021: true,
  },
  extends: [
    'airbnb-base',
  ],
  parser: '@typescript-eslint/parser',
  parserOptions: {
    ecmaVersion: 12,
    sourceType: 'module',
  },
  plugins: [
    '@typescript-eslint',
  ],
  rules: {
  },
};
在项目的会生成以上的.eslintrc.js文件
module.exports = {
  rules: {
      'no-console': 0,
  },
}
一般我们都要在rules加上no-console为0,打开可以用console功能
2.2 命令
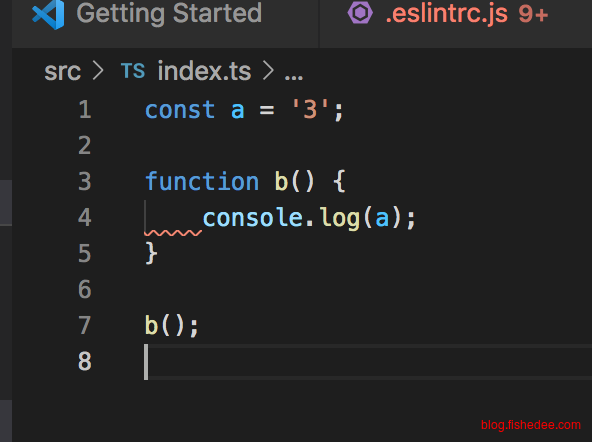
const a = "3";在src/index.ts中写入一个编译没错的问题,但是不够严格的文件
npx eslint src/**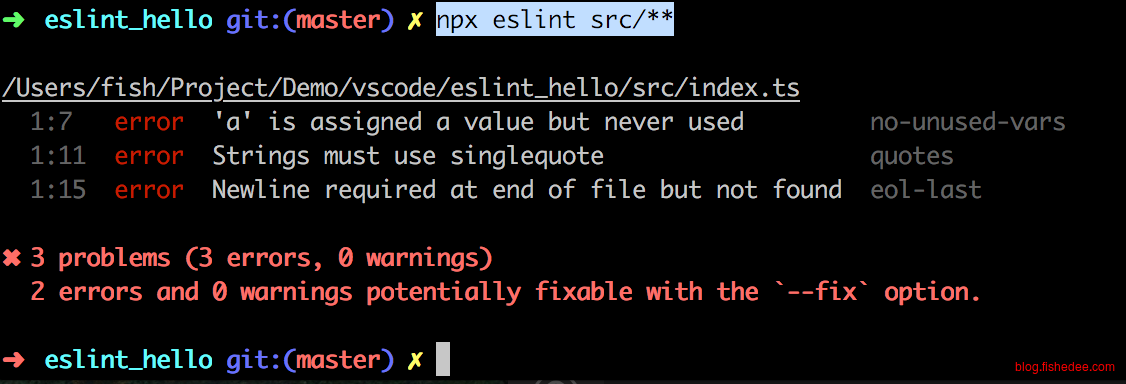
然后执行eslint,它就会提示变量a声明了,但是没有使用过。
2.3 VSCode集成
当然,站在我们的角度,我们当然希望写代码的时候,就能自动提示eslint的错误,而不是每次都要手动触发命令

在Extension安装ESLint工具
"editor.formatOnSave": false,
"editor.codeActionsOnSave": {
    "source.fixAll": true,
    "source.fixAll.eslint": true
}
在用户配置Settings.json加入以上配置
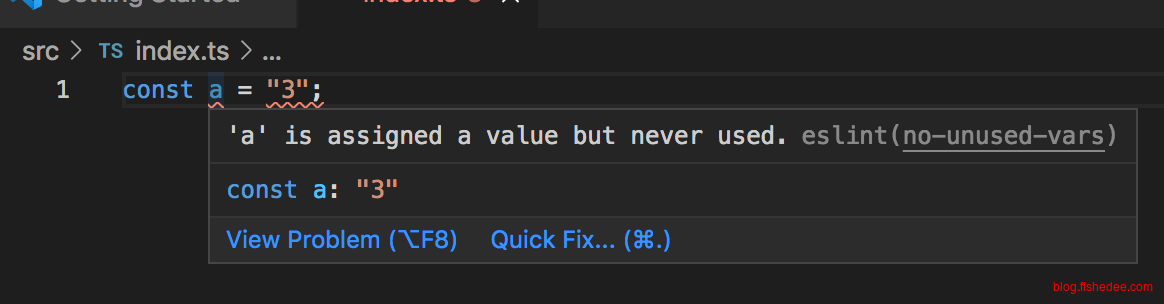
这个时候源文件就会自动有波浪线,提示代码有不严格的地方。
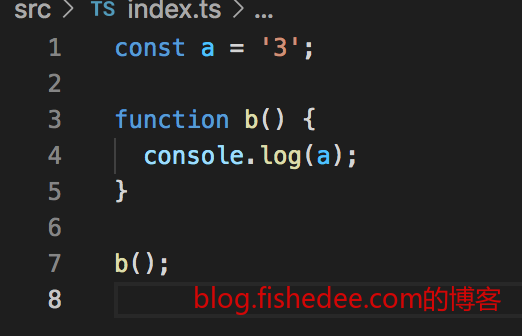
改成以上代码就没问题了
写代码的时候也会发现,代码会自动缩进和格式化,这是比较方便的。因为ESLint本来就自带保存时格式化代码的功能,所以要关闭VSCode默认的editor.formatOnSave功能才行
2.4 FAQ
2.4.1 Unable to resolve path to module
部分情况下,ESLint竟然不能识别Import的导入方式,这个时候你需要这个
npm install eslint-plugin-import --save-dev安装依赖
{
    extends:{'plugin:import/typescript','plugin:import/recommended'}
    rules:{
        'import/extensions': [
            'error',
            'ignorePackages',
            {
                js: 'never',
                jsx: 'never',
                ts: 'never',
                tsx: 'never',
            },
        ],
    }
}
在eslint的配置文件中加入这两个即可。这个问题一般是因为引入了airbnb的eslint配置导致的,默认eslint的推荐配置没有这个问题
3 Prettier
代码在这里
一般来说,我们用Prettier来格式化代码,而不是用ESLint来格式化代码,Prettier更为专业,所以我们要让两者协同一起工作。
3.1 安装依赖
npm install --save-dev prettier
npm install --save-dev eslint-config-prettier
npm install --save-dev eslint-plugin-prettier
安装以上依赖
{
    "trailingComma": "es5",
    "tabWidth": 4,
    "semi": true,
    "singleQuote": true
}
在项目中加入.prettierrc.json的配置文件
3.2 命令
npx prettier --write .执行命令,将代码格式化
3.3 与ESLint协同
当我们将代码用Prettier格式化以后,ESLint就会抱怨格式化的形式不对,因为它认为缩行应该是2个空格,而不是4个空格。另外,修改代码后,重新保存,又会回到ESLint的2个空格的格式化方式去了
module.exports = {
    env: {
        browser: true,
        es2021: true,
    },
    extends: ['airbnb-base', 'prettier'],
    parser: '@typescript-eslint/parser',
    parserOptions: {
        ecmaVersion: 12,
        sourceType: 'module',
    },
    plugins: ['@typescript-eslint', 'prettier'],
    rules: {
        'prettier/prettier': 'error',
        'no-console': 0,
    },
};
因此,我们要在extends,plugins,rules都加入关于prettier的配置才行。修改完毕后,重启VSCode即可。这个时候保存以后,就不会产生ESLint就会抱怨格式化的形式不对的问题。
3.4 VSCode集成
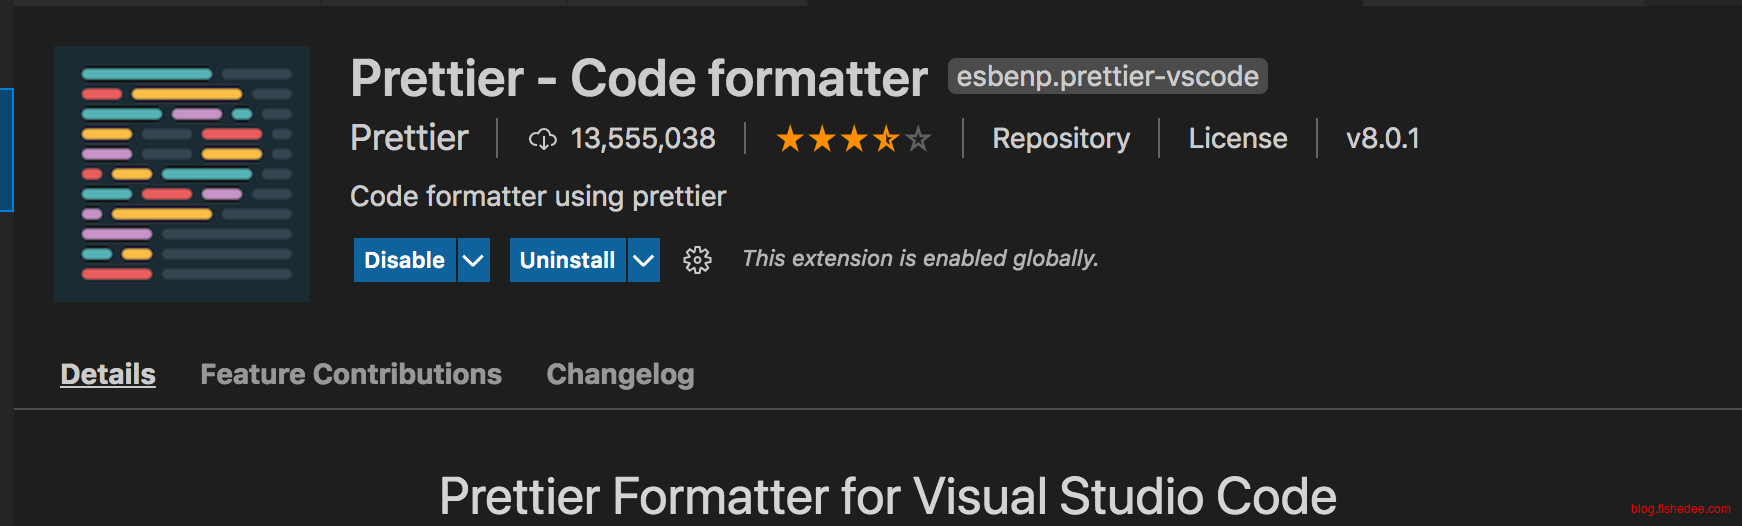
对于,没有使用ESLint的项目,而我们想要单独使用Prettier的时候,就需要安装Prettier的插件。
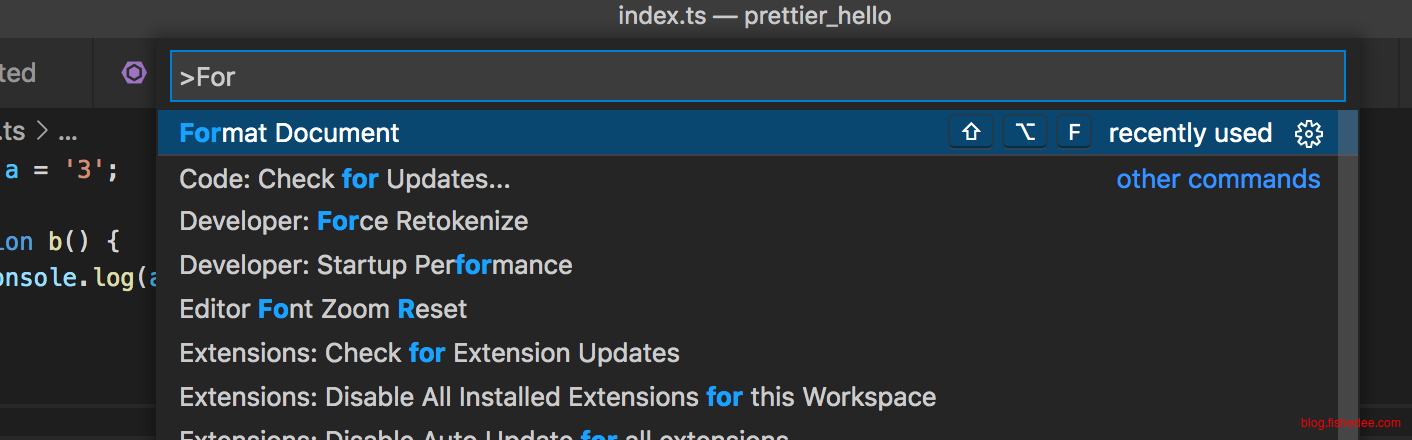
然后输入命令Shift+框+P快捷键,输入Format Document
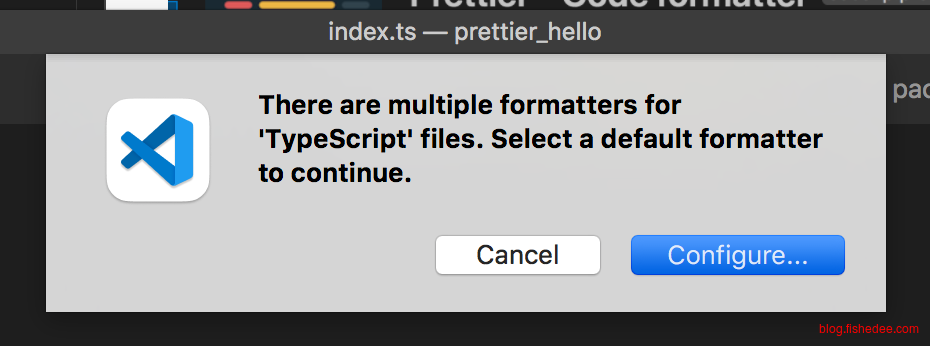

它会提示有多个格式化工具,我们选择Prettier即可。

VSCode会自动在settings.json加入对TypeScript文件的默认格式化工具,下次就不用选工具了
3.5 FAQ
3.5.1 Cannot find module package.json
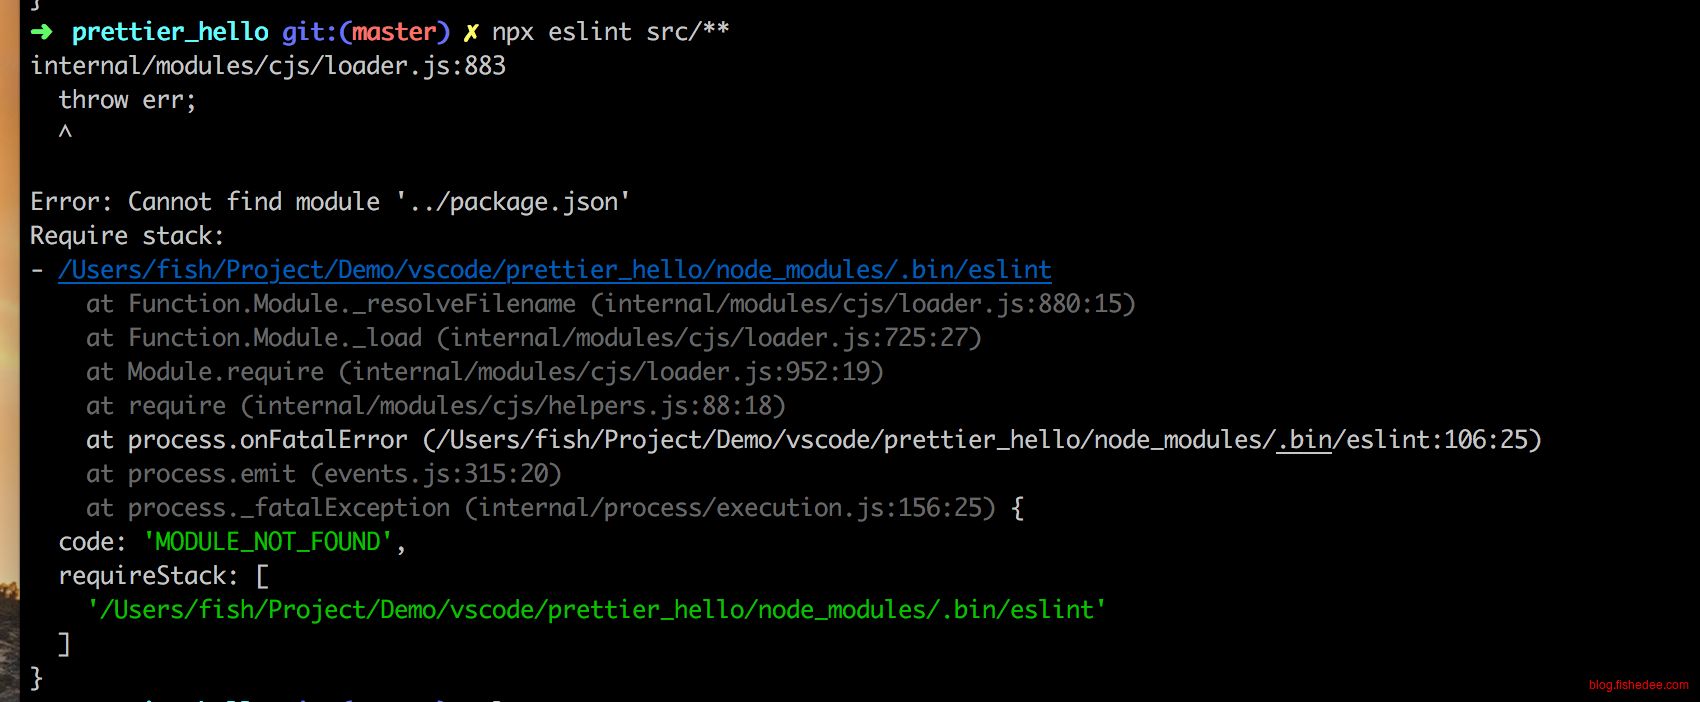
安装了Prettier以后报错了以上的错误,解决方法就是删除
3.5.2 Insert … prettier/prettier

安装prettier以后eslint用不了
npx eslint src/** --fix输入以上命令即可
4 VSCode
4.1 启动配置
IDE的一个功能是,输入快捷键启动程序
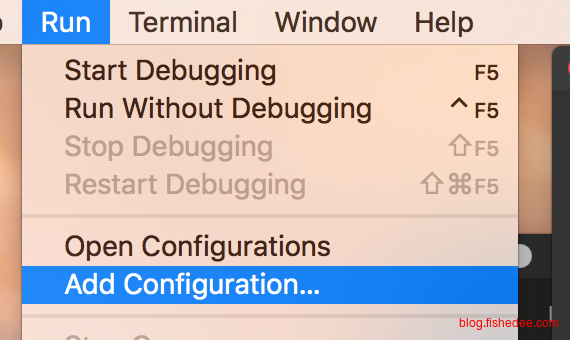
在当前项目中,选择Run Add Configuration
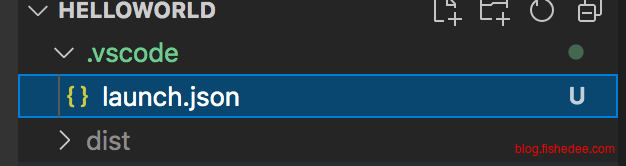
vscode就会在当前项目中,生成lanuch.json
{
    // Use IntelliSense to learn about possible attributes.
    // Hover to view descriptions of existing attributes.
    // For more information, visit: https://go.microsoft.com/fwlink/?linkid=830387
    "version": "0.2.0",
    "configurations": [
        {
            "type": "pwa-node",
            "request": "launch",
            "name": "Launch Program",
            "skipFiles": [
                "<node_internals>/**"
            ],
            "program": "${workspaceFolder}/src/index.ts",
            "preLaunchTask": "tsc: build - tsconfig.json",
            "outFiles": [
                "${workspaceFolder}/dist/**/*.js"
            ]
        }
    ]
}
我的配置是以上这个
然后输入F5就能启动程序了,相当方便
4.2 项目配置
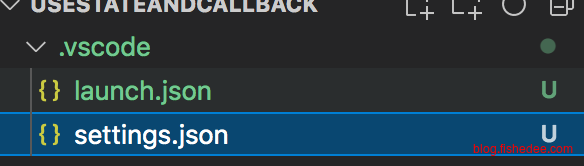
在启动配置的旁边,加入settings.json
{
    "editor.formatOnSave": true,
    "workbench.tree.indent": 20,
    "workbench.tree.renderIndentGuides": "always",
    "files.eol": "\n",
    "files.encoding": "utf8"
}
我们就能配置该项目内的内容了,这样能覆盖用户的自身配置,配置如下:
- editor.formatOnSave,保存时进行格式化,注意用ESLint插件的时候不要打开
- workbench.tree.indent,文件树的缩进像素
- workbench.tree.renderIndentGuides,文件树的缩进引导线
- files.eol,换行配置
- files.encoding,文件编码
4.3 npm命令
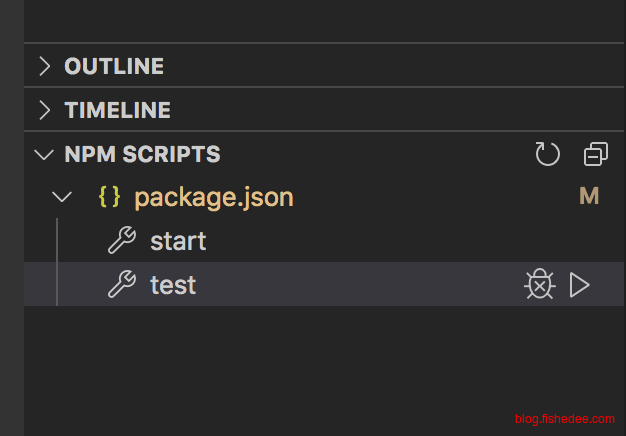
VSCode左下角就有npm scripts选项,点击开启按钮就能直接执行了
4.4 列选择
- 鼠标操作,用滚轮中键,长按选择即可
- 键盘操作,Mac下,Option+Shift+鼠标左键。Windows下,Alt+Shift+鼠标左键
5 npm
我们了解一下如何发布一个包。参考资料在这里
5.1 发布基础包
npm init创建一个npm文件夹,填写好keyword以及author的信息,name就是发布的包名信息
npm adduser在npm官网注册好账号密码,然后就可以在本地使用以上命令来本地登录npm账号了
npm publish输入以上账号就能发布npm包了
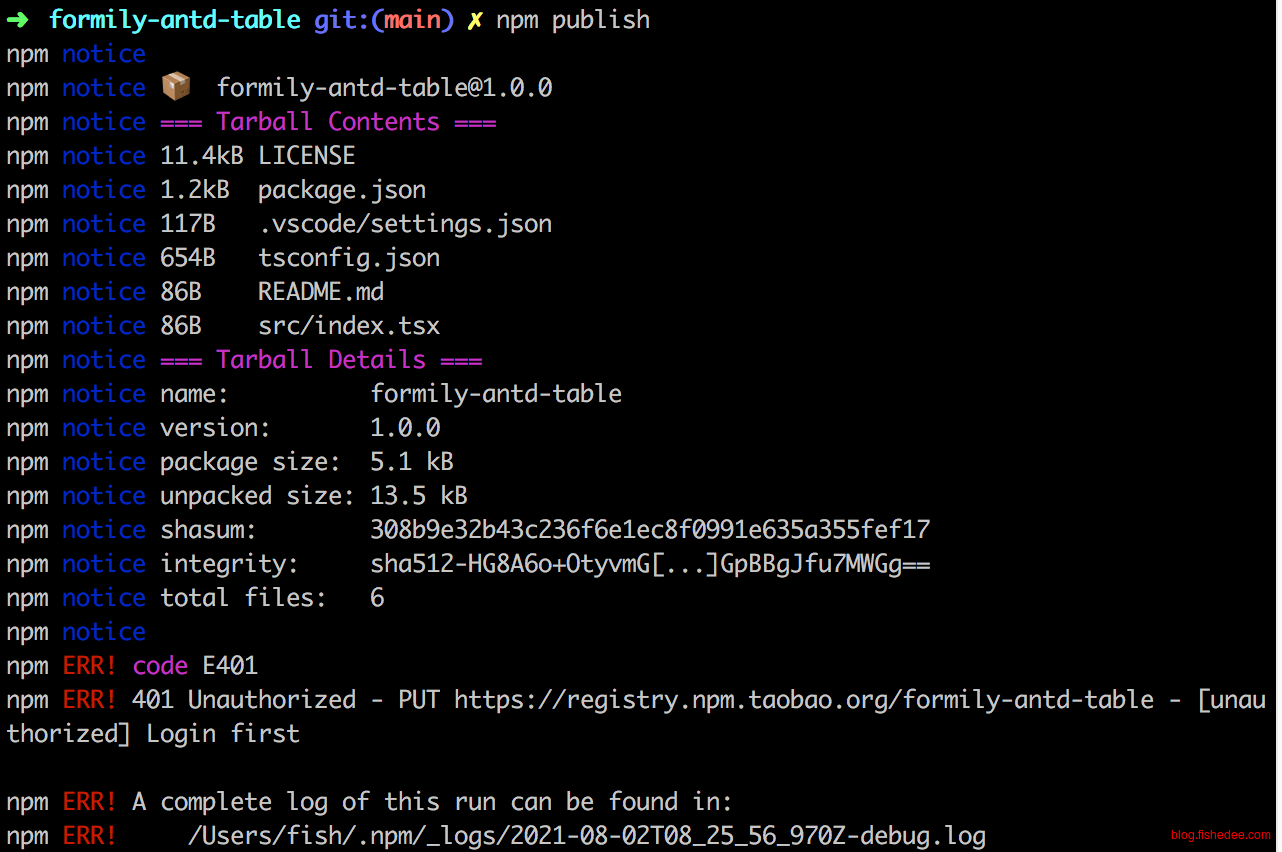
如果显示为taobao.org,401 Unauthorized错误,是因为不能发布到npm镜像地址,只能发布到npm原始地址导致的。
npm i nrm -g
nrm use npm
使用以上命令就能自由切换到npm的原始源上面了
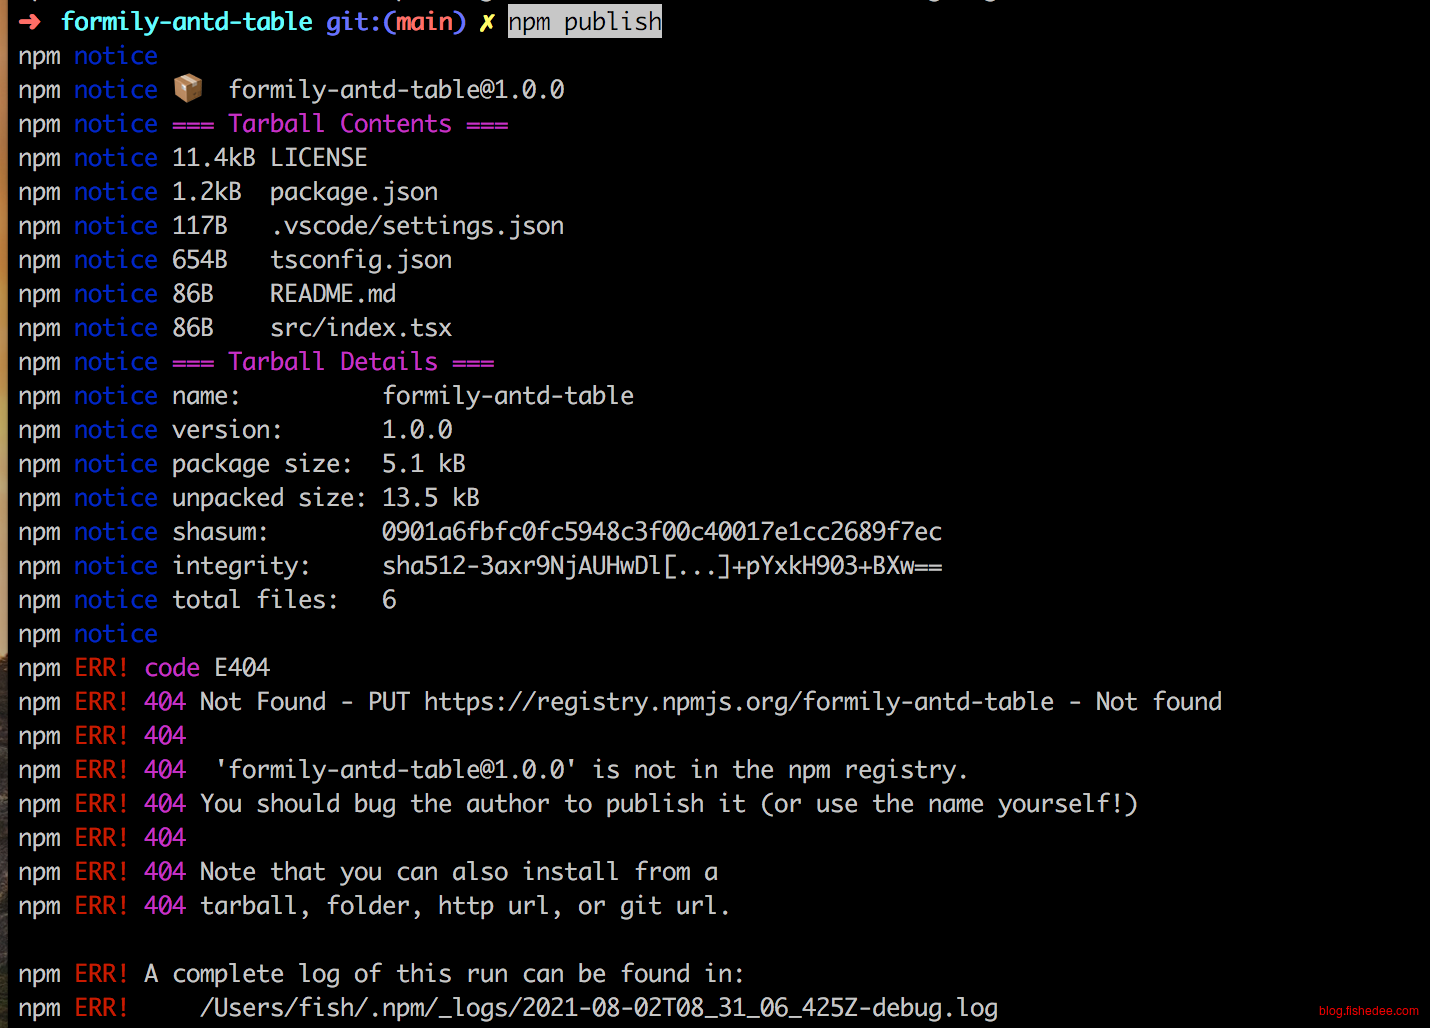
更改了npm原始源以后,依然显示发布失败的话,就是因为你的账号密码没有填写好导致的。重新输入npm adduser来设置账号密码吧
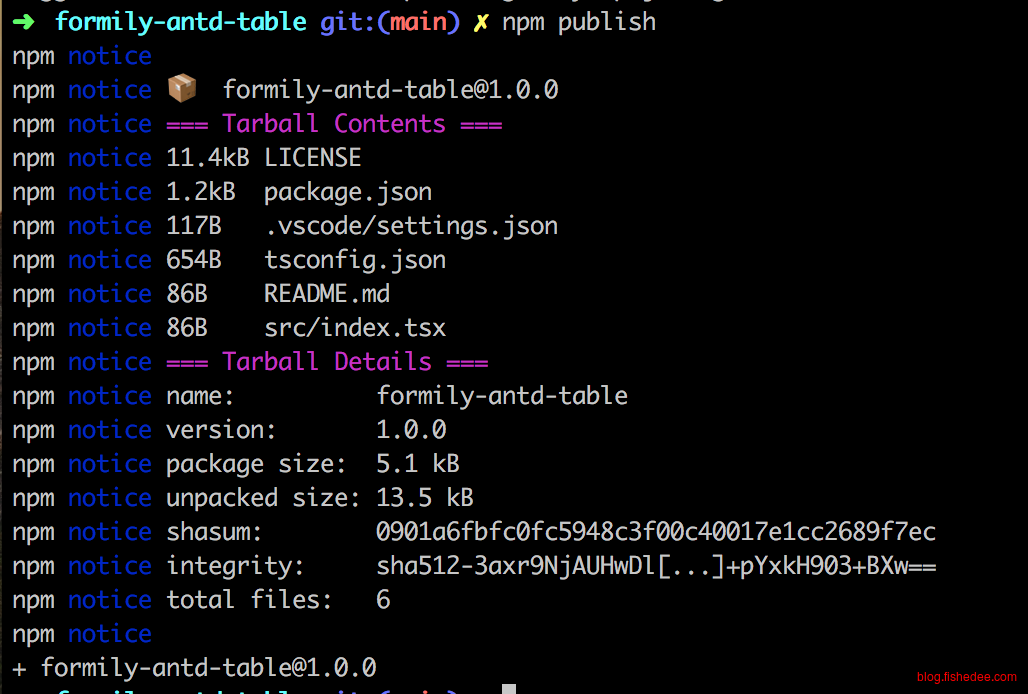
这是最终发布成功的显示信息
5.2 配置
5.2.1 package.json
{
    "name": "formily-antd-table",
    "version": "1.0.0",
    "description": "Formily for AntDesign Table,Most Easy Way To Use AntDesign Table",
    "main": "lib",
    "module": "esm",
    "scripts": {
        "start": "rimraf -rf lib esm && npm run build:cjs && npm run build:esm",
        "test": "echo \"Error: no test specified\" && exit 1",
        "build:cjs": "tsc --project tsconfig.json",
        "build:esm": "tsc --project tsconfig.json --module es2015 --outDir esm"
    },
    "repository": {
        "type": "git",
        "url": "git+https://github.com/fishedee/formily-antd-table.git"
    },
    "author": "fishedee",
    "license": "ISC",
    "bugs": {
        "url": "https://github.com/fishedee/formily-antd-table/issues"
    },
    "homepage": "https://github.com/fishedee/formily-antd-table#readme",
    "devDependencies": {
        "prettier": "^2.3.2",
        "typescript": "^4.3.5"
    },
    "peerDependencies": {
        "@formily/core": ">= 2.0.0-beta.84",
        "@formily/json-schema": ">= 2.0.0-beta.84",
        "@formily/react": ">= 2.0.0-beta.84",
        "@formily/reactive": ">= 2.0.0-beta.84",
        "@formily/reactive-react": ">= 2.0.0-beta.84",
        "@formily/shared": ">= 2.0.0-beta.84",
        "@ant-design/icons": "^4.0.0",
        "antd": "^4.0.0",
        "@types/react": ">=16.8.0 || >=17.0.0",
        "@types/react-dom": ">=16.8.0 || >=17.0.0",
        "react": ">=16.8.0 || >=17.0.0",
        "react-dom": ">=16.8.0 || >=17.0.0"
    }
}
关键在于配置以下几点:
- name,包名,发布到npm源的包名是什么
- version,版本号,需要符合npm源的语义
- main,普通的入口,就是用require导入的时候,实际是导入哪个文件夹
- module,ES6的入口,就是用import导入的时候,实际是导入哪个文件夹
- author,作者
- peerDependencies,插件包,哪些依赖是宿主提供的,还是自己提供的,看这里
5.2.2 .npmignore
.npmignore决定了哪些文件需要提交到npm源,哪些不需要,它的写法和.gitignore是完全一样的。
当没有.npmignore文件的时候,就会自动使用.gitignore文件
5.2.3 esm与lib
我们一般用typescript写代码,发布的时候要注意,需要包含有:
- es5模块,和es2015模块的两种打包方式的生成文件
- .d.ts,类型声明declaration文件,方便使用方使用typescript类型声明
- .map,代码sourceMap文件,方便调试
{
    "compilerOptions": {
        "outDir": "./lib",
        "esModuleInterop": true,
        "moduleResolution": "node",
        "jsx": "react",
        "lib":["es2015","DOM"],
        "module": "commonjs",
        "target": "es5",
        "allowJs": false,
        "noUnusedLocals": false,
        "removeComments": true,
        "preserveConstEnums": true,
        "sourceMap": true,
        "declaration": true,
        "experimentalDecorators": true,
        "downlevelIteration": true,
        "baseUrl": "."
    },
      "include": ["./src/**/*.ts", "./src/**/*.tsx"],
      "exclude": ["node_modules","./src/__tests__/*", "./esm/*", "./lib/*"]
}
这是一份参考的tsconfig.json文件,target为es5的
"scripts": {
    "start": "rimraf -rf lib esm && npm run build:cjs && npm run build:esm",
    "test": "echo \"Error: no test specified\" && exit 1",
    "build:cjs": "tsc --project tsconfig.json",
    "build:esm": "tsc --project tsconfig.json --module es2015 --outDir esm"
}
然后我们在package.json中设置好scripts,需要同时发布es5模块,与es2015模块的两种文件
5.3 多包开发时引用
我们在开发包的时候,我们常常会开发一个a包,然后用另外一个b包来测试a包的代码。但是,在a包代码变更了以后,一般情况下,我们需要重新publish a包,b包才能获取到a包的最新代码。这样做的话,显然会导致开发效率极其低下,而且会污染npm源的版本号。
我们希望,在开发过程中,b包能直接引用本地的a包,而不是每次都从npm源拉取最新的a包。
我们有两种方法解决这个问题,在这之前,你需要了解这里和这里的基础知识
这个问题并不容易,有专门的lerna工具来解决这个问题,我们在这里介绍如何不使用lerna来解决它。
5.3.1 node的模块查找
代码在这里
TypeScript与Umi在查找包的时候,默认以node的方式进行模块查找
➜  examples git:(master) ls -lah
total 0
drwxr-xr-x   4 fish  staff   136B Aug  2 20:44 .
drwxr-xr-x  13 fish  staff   442B Aug  2 20:48 ..
drwxr-xr-x  15 fish  staff   510B Aug  2 20:53 basic
drwxr-xr-x   3 fish  staff   102B Aug  2 20:49 node_modules
在basic包里面,我们希望引用父级的外层目录作为my_package包。那么,我们在basic的上一级目录examples中,建立一个node_modules目录
➜  node_modules git:(master) ls -lah
total 8
drwxr-xr-x  3 fish  staff   102B Aug  2 20:49 .
drwxr-xr-x  4 fish  staff   136B Aug  2 20:44 ..
lrwxr-xr-x  1 fish  staff    11B Aug  2 20:49 my_package -> ../../dist/
建立一个my_package的引用,来指向父级的目录就可以了。
5.3.2 指定TypeScript与Umi的模块查找
代码在这里
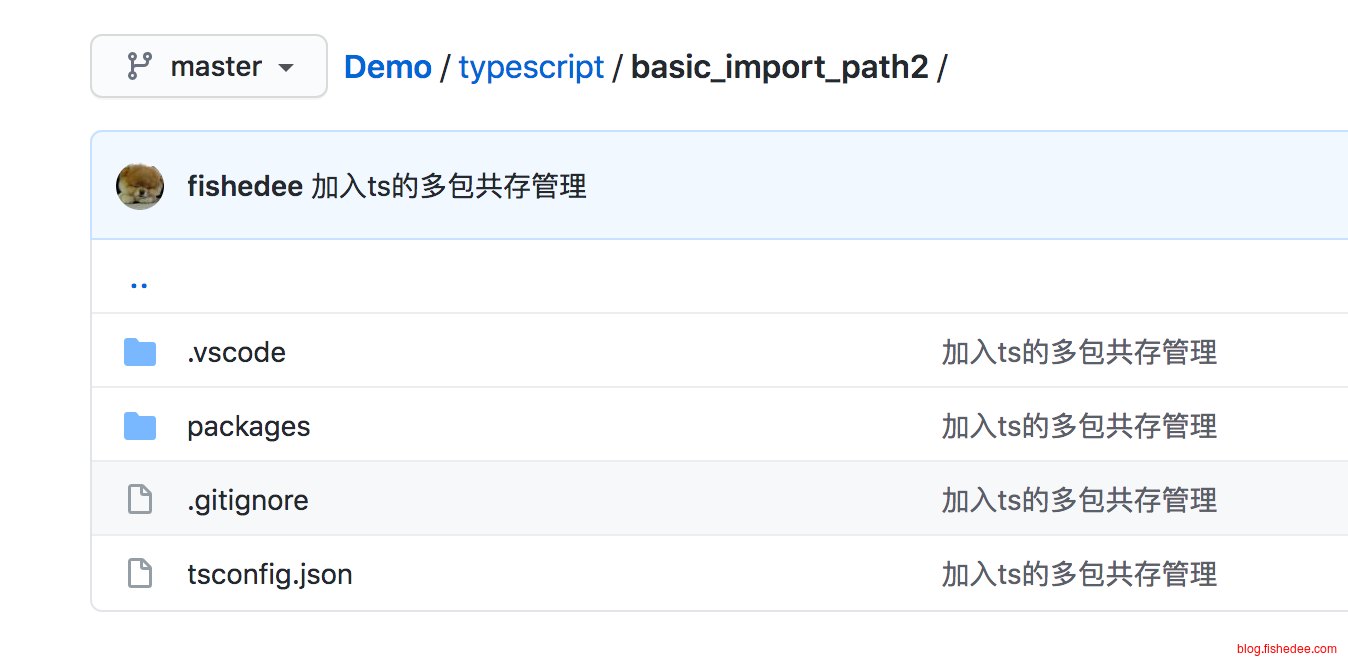
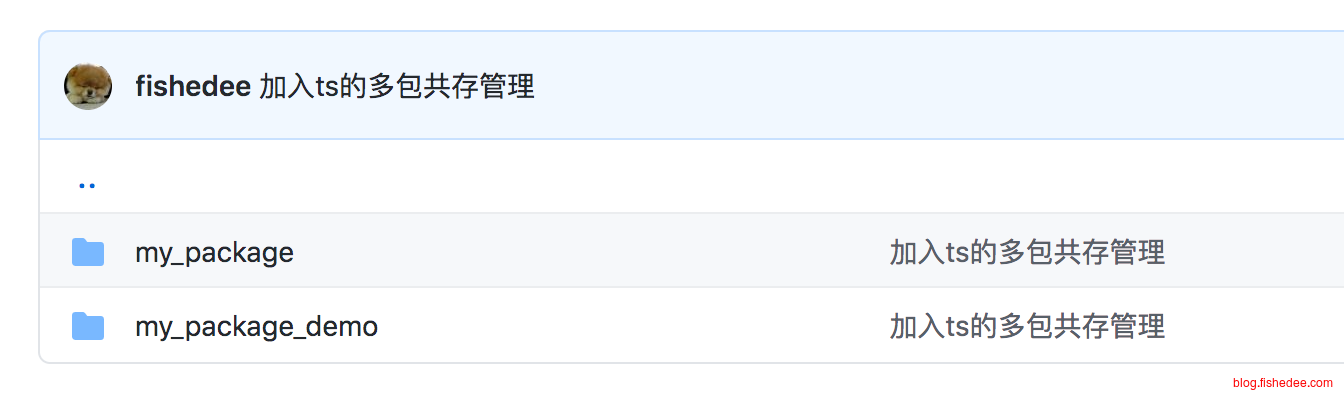
另外一种办法是,将项目的所有包都平级地放在packages目录中
{
  "extends": "../../tsconfig.json",
  ...
}
在my_package_demo的tsconfig.json中指定ts的配置文件引用父级的配置文件
{
    "compilerOptions": {
      "baseUrl": ".",
      "paths": {
        "@my_package": ["packages/my_package/src"]
      }
    }
}
而父级的配置文件,指定了my_package包就是来源于packages文件夹的代码,这样就解决了编译时模块查找的问题。
import { defineConfig } from 'umi';
import path from 'path';

export default defineConfig({
    ...
    alias: {
        '@my_package': path.resolve(__dirname, '../my_package/esm'),
    },
});
在my_package_demo的.umirc.ts中alias,就能解决打包时的模块查找问题。也可以用resolve.include来解决,这是另外一种方法。
5.3.3 TypeScript的paths,NPM的Link
代码在这里
以上的两种方法都能轻松解决编译时的模块查找问题,但是无法解决打包时的一个问题。A包依赖我们写的B包,与此同时,A包与B包都依赖一个共同的C包。如果该C包在B包的node_modules定义一份,在A包的node_modules也定义一份,就会导致打包时打包了两份C包到最终包里面。这不仅会产生C包的大小冗余,而且A包对C包的写入,B包是无法感知的,因为A包与B包对应的C包位置不同!这会产生相当隐晦的bug。
有三种解决办法:
- 将A包与B包的共同依赖,往上抽取到父级的node_modules目录,而不是各自的node_modules目录。但是对于部分工具,例如Umi来说并不支持
- 在A包的node_modules里面,做一个软链,连接到B包的目录。同时B包的node_modules不能包含任何C包的依赖
- 将B包软链到顶级/usr/local/lib/node_modules目录,然后,在A包的node_modules里面,软链一个到/usr/local/lib/node_modules/B的目录
后面两种方法都可以,第三种方法npm提供了npm link工具来专门实现这个方案,我们来看一下吧。
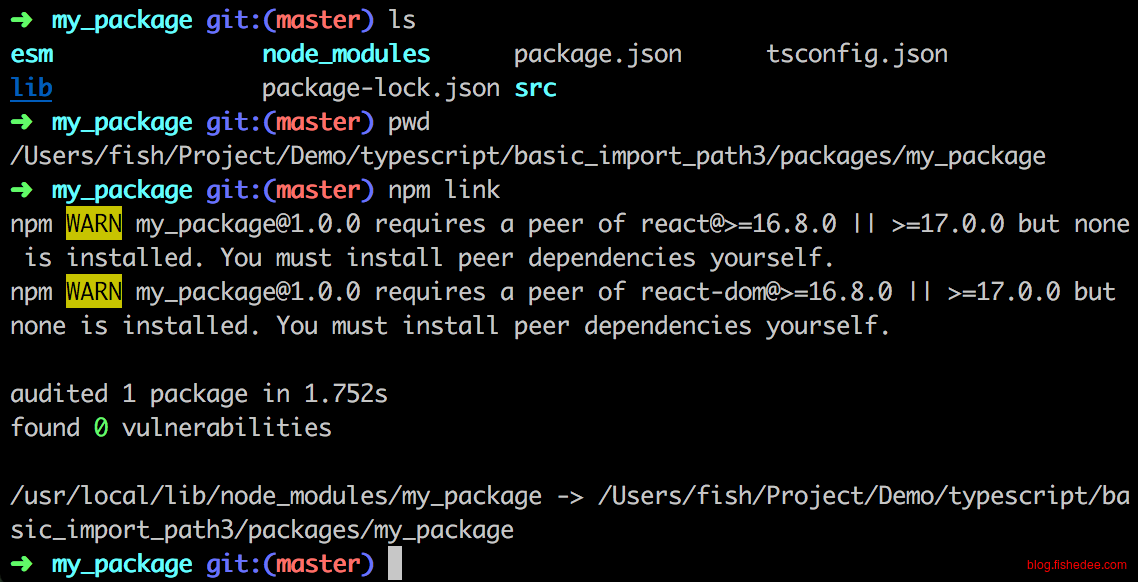
首先,在B包,也就是我们的my_package包的目录下,输入npm link,就会在顶级目录/usr/local/lib/node_modules中产生一个指向当前目录的软链。
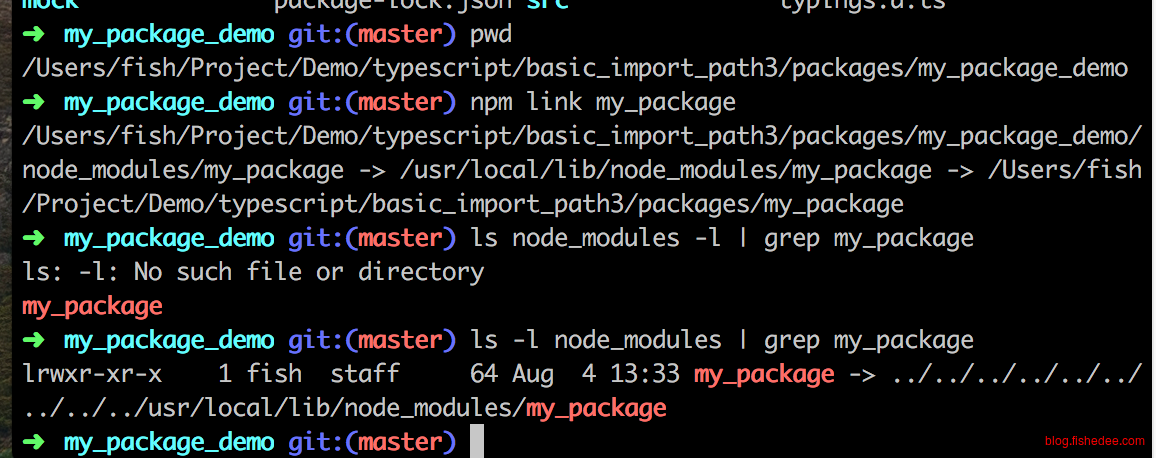
然后,在A包,也就是我们的my_package_demo包的目录下,输入npm link my_package目录,就会在当前包的node_modules造一个软链,连接到顶级目录/usr/local/lib/node_modules/my_package包。
注意,这种方法简单直观,但是会对全局的node_modules产生影响,对于多版本的my_package包开发无法支持,要考虑场景使用。我们可以沿用该原理,在A包做一个相对路径到B包的软链也能达成一样的效果,就是第2点用的方法。
5.3.4 dumi
dumi天生就是解决这类问题的,看这里
5.3.5 小结
无脑上dumi,大项目再加lerna就可以了。dumi与lerna可以配搭一起使用的。
5.4 FAQ
5.4.1 Windows乱码
chcp 65001换一下Windows下的codepage就可以了
5.4.2 无法运行cnpm
set-ExecutionPolicy RemoteSignedPowerShell用管理员执行以上命令即可
5.4.3 切换镜像nrm
npm install -g nrm
nrm use taobao
使用nrm切换镜像
5.4.4 npm全局命令
PS C:\Users\fish> npm config ls
; "builtin" config from C:\Program Files\nodejs\node_modules\npm\npmrc

prefix = "C:\\Users\\fish\\AppData\\Roaming\\npm"

; "user" config from C:\Users\fish\.npmrc

home = "https://npm.taobao.org"
msvs_version = "2017"
registry = "https://registry.npmmirror.com/"

; node bin location = C:\Program Files\nodejs\node.exe
; cwd = C:\Users\fish
; HOME = C:\Users\fish
; Run `npm config ls -l` to show all defaults.
PS C:\Users\fish>
使用npm config ls查看prefix位置,然后将prefix加入PATH环境变量,就能使用npm中全局命令了
6 Chrome Dev Tools
Chrome 可以说是神器了,同时包含了Inspector,Performanche,Debuger,Memory等多种功能
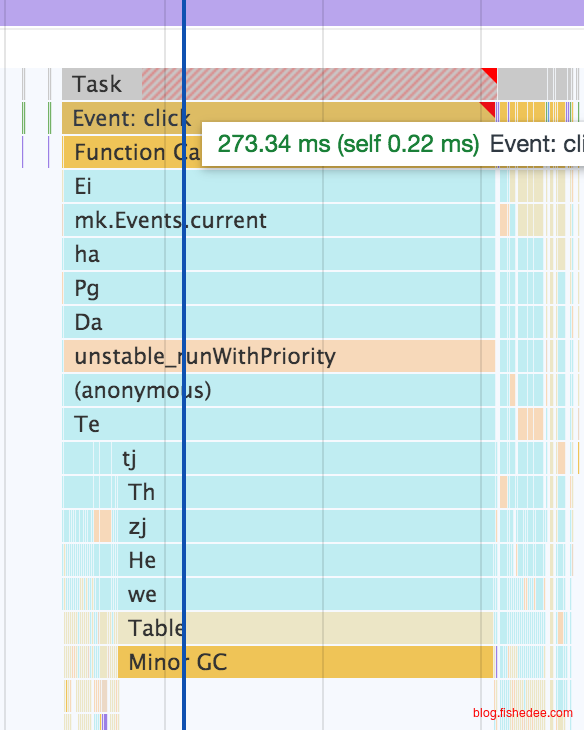
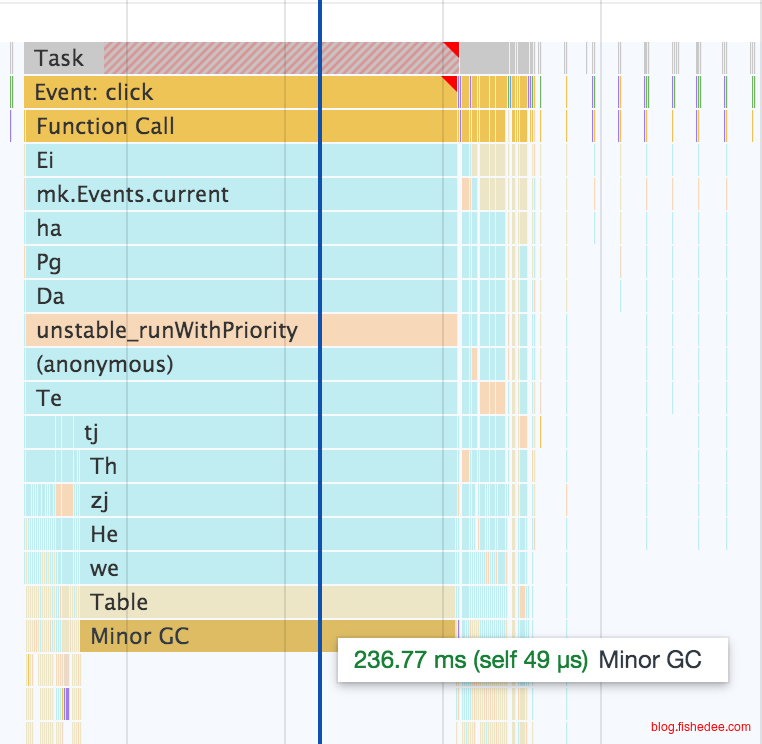
总时间是273ms,MinorGC用了236ms
但要注意Chrome Dev Tools自身的开销并不少。一个例子,在进行Chrome Dev Tools开启了Memory的多个测试以后,再进行Performance测试,会发现,MinorGC占比高达80%的开销。由于网页的Memory只有30MB,不太可能会产生这么长时间的GC停顿,所以,问题只能归结于,Chrome Dev Tools在自身进行Memory测试以后产生巨大的内存占用导致的。另外,关闭Chrome Dev Tools标签,再重新打开后,该GC停顿也会随之而消失。
以下做法并不能释放Chrome Dev Tools自身的内存
- 删除Performance与Memory里面的测试结果
- 把测试页面重新Reload
7 Parallel
Parallel是Mac下最常用的虚拟机工具了,我们可以在里面装windows系统,测试不同系统的兼容性。
各iso的下载地址如上,最好就是装64位了。
- 64位系统能充分使用内存
- 记得在BIOS打开intel vmx virtualization technology,能充分使用CPU
8 总结
花点时间学习一下吧,麻烦但不困难
- 本文作者: fishedee
- 版权声明: 本博客所有文章均采用 CC BY-NC-SA 3.0 CN 许可协议,转载必须注明出处!